Managing your leave efficiently is essential for maintaining a healthy work-life balance. With the HRMS Indian Railways, railway employees can apply for leave online without visiting their department. This digital system makes the process faster, transparent, and easy to track.
Earlier, employees had to submit physical leave applications and wait for approvals. However, the HRMS Railway portal now allows you to apply for, monitor, and manage leave requests directly from your dashboard. Therefore, this guide explains how to apply for leave in the Railway HRMS portal step by step, along with tips, rules, and solutions to common issues.
Why Use HRMS for Leave Application
Before starting the process, you should understand the benefits of using an HRMS.
Key Benefits:
- Online application process
- Faster approval
- Easy tracking of leave status
- Reduced paperwork
As a result, employees can manage leave efficiently.
Types of Leave You Can Apply
The HRMS Railway portal supports different leave types.
Common Leave Types:
- Casual Leave (CL)
- Earned Leave (EL)
- Half Pay Leave (HPL)
- Medical Leave
- Maternity/Paternity Leave
Therefore, choose the correct leave type before applying.
Requirements Before Applying for Leave
Before starting the process, make sure you have the required details ready.
You Need:
- HRMS ID or Username
- Password
- Leave details (dates, type, reason)
- Stable internet connection
In addition, ensure your leave balance is sufficient.
Step-by-Step Guide to Apply Leave in HRMS Railway Portal
Now, let’s go through the complete process. Follow each step carefully.
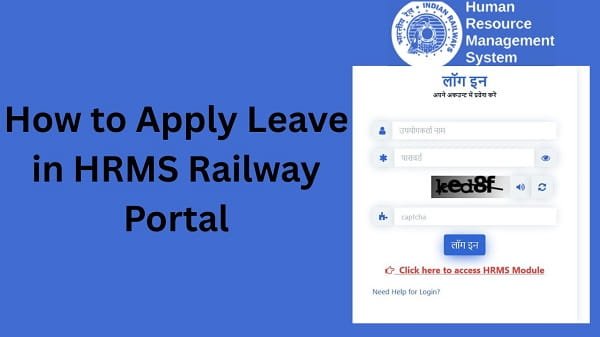
Step 1: Visit the Official HRMS Railway Portal
First, open your browser and visit the official HRMS Railway website.
Always use the correct portal to avoid security risks. Once the homepage loads, go to the login section.
Step 2: Log In to Your Account
Next, enter your login details:
- HRMS ID or Username
- Password
After that, complete OTP verification if required. Then, click on the Login button.
If your details are correct, you will be able to access your dashboard.
Step 3: Navigate to Leave Management Section
After logging in, look for the Leave Management section.
This section contains all leave-related services.
Step 4: Click on Apply Leave Option
Now, select the Apply Leave option.
This will open the leave application form.
Step 5: Select Leave Type
Next, choose the appropriate leave type.
Tips:
- Use CL for short-term needs
- Use EL for planned leave
- Use medical leave for health issues
Therefore, selecting the right type is important.
Step 6: Enter Leave Details
After selecting the leave type, fill in your leave details.
Required Information:
- Start date and end date
- Reason for leave
- Contact details (if required)
As a result, your application becomes complete.
Step 7: Check Leave Balance
Before submitting, check your leave balance.
Why It Matters:
Insufficient balance may lead to rejection.
Therefore, ensure you have enough leave available.
Step 8: Review Application
Now, review all details carefully.
Check:
- Leave dates
- Leave type
- Reason
As a result, you avoid errors.
Step 9: Submit Leave Application
Finally, click on the Submit button.
After submission:
- Your request gets recorded
- It goes for approval
Therefore, the process begins.
What Happens After Applying Leave
After submitting your application, the system processes it.
Process:
- Supervisor reviews the request
- Approval or rejection is decided
- Status updates in HRMS
As a result, you can easily track your leave.
How to Check Leave Status
You can monitor your leave application status at any time.
Steps:
- Go to the Leave Management section
- Click on Leave Status
- View current status
Status Types:
- Pending
- Approved
- Rejected
Therefore, you stay informed.
Common Issues While Applying Leave (And Fixes)
Although the process is simple, users sometimes face problems. However, you can easily fix them.
1. Leave Application Not Submitted
Solution:
- Fill all required fields
- Check the internet connection
2. Incorrect Leave Type Selected
Solution:
- Review leave type
- Reapply if needed
3. Insufficient Leave Balance
Solution:
- Check balance
- Apply for a different leave type
4. Page Not Loading
Solution:
- Refresh page
- Clear browser cache
- Try another browser
Tips for a Successful Leave Application
To ensure smooth approval, follow these tips.
Helpful Tips:
- Apply leave in advance
- Provide a clear reason
- Choose the correct leave type
- Maintain communication with your supervisor
As a result, your leave gets approved easily.
Common Mistakes You Should Avoid
Many employees make simple errors.
Avoid These:
- Submitting an incomplete application
- Entering incorrect dates
- Ignoring leave balance
- Applying at the last moment
Therefore, careful application improves success.
What to Do If Leave Is Rejected
If your leave gets rejected, do not worry.
You Can:
- Check rejection reason
- Correct errors
- Reapply
They can help improve your chances.
Conclusion
Applying for leave in the HRMS Indian Railways is simple when you follow the correct steps. First, log in to your account, then navigate to the leave section, fill in the details, and submit your application.
Moreover, by understanding rules and avoiding common mistakes, you can improve your chances of approval. In addition, tracking your leave status helps you stay informed.
Use this guide to easily apply for your HRMS Railway leave and manage your time effectively.
FAQs
Q1. How can I apply for leave?
A: You can apply through the Leave Management section after logging in.
Q2. Can I apply for leave online?
A: Yes, through the HRMS Railway portal.
Q3. How long does approval take?
A: It depends on your department.
Q4. Can I track leave status?
A: Yes, through the portal.
Q5. What if my leave is rejected?
A: You can correct and reapply.